A few weeks ago, a reader asked us a question that many can relate to: Is there an easy way to select multiple checkboxes using just one checkbox?
Dealing with numerous checkboxes in a spreadsheet is a common challenge. Manually ticking each checkbox becomes a daunting task, prompting the need for a single checkbox capable of handling them all.
In this post, I'll show you how to achieve this in Excel. It's important to note that I assume you have a basic understanding of chec
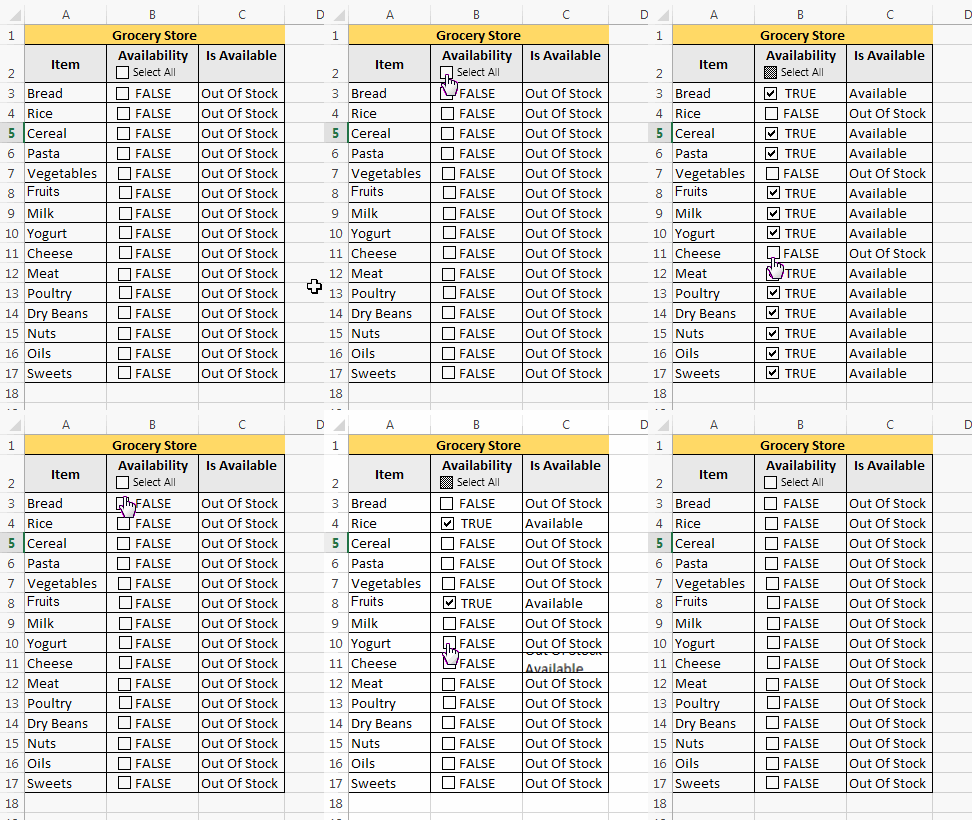
Take a quick look at the animated image below to get a glimpse of the straightforward outcome you're about to achieve.
Note: Before diving into the steps, it's crucial to ensure that macros are enabled on your system. If you're uncertain about this setting, take a moment to review this post for guidance.
Selecting Multiple Checkboxes Using a Single Checkbox
Below is a step by step instruction to create a “Select All” checkbox in Excel. To make things easier we will refer to the "Select All" checkbox as 'Master checkbox' and all the other checkboxes as 'Child checkboxes'. So here we go:
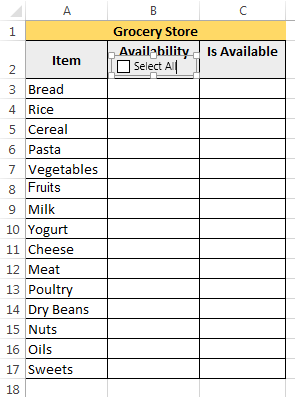
- First of all add a checkbox to your sheet. You can add the checkbox by navigating to Developer Tab > Insert > Checkbox. Title this checkbox as "Select All", this will be your Master Checkbox.
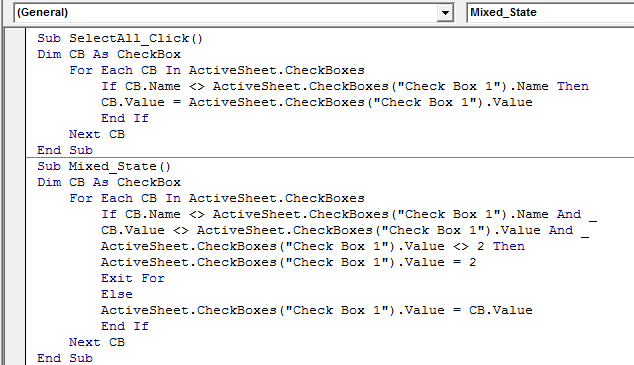
- Now, press Alt + F11, to open the VBA Editor, navigate to Insert > Module and paste the below code.
Sub SelectAll_Click()
Dim CB As CheckBox
For Each CB In ActiveSheet.CheckBoxes
 If CB.Name <> ActiveSheet.CheckBoxes("Check Box 1").Name Then
 CB.Value = ActiveSheet.CheckBoxes("Check Box 1").Value
 End If
Next CB
End Sub
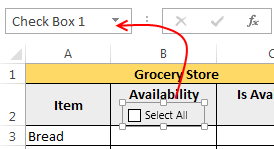
This code makes sure that when your 'Master Checkbox' is checked, all the 'Child checkboxes' on the active sheet should follow it i.e. they should have the same value as it has.Note: Make sure that the name of your 'Master Checkbox' is "Check Box 1". If not, then change the "Check Box 1" in the above VBA code with with the exact name of your 'Master Checkbox.'. You can check the name of your 'Master Checkbox' using the “Name Box”.
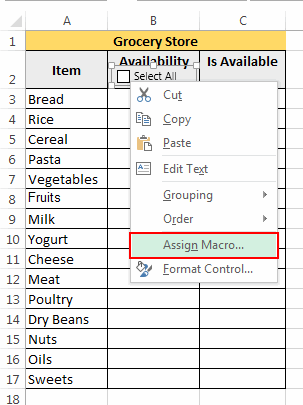
- After this, go back to the spreadsheet and right-click Master Checkbox, and from the drop-down select the option “Assign Macro”.
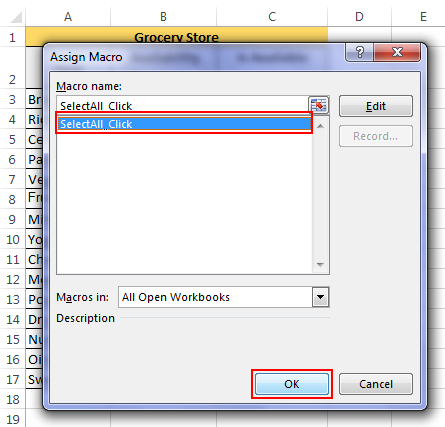
- Now, the “Assign Macro” window will open, click the “SelectAll_Click” macro and press “OK”. This will assign the “SelectAll_Click” macro on the click event of your Master Checkbox.
- Next, again go back to the VBA Editor and paste the below code there.
Sub Mixed_State()
Dim CB As CheckBox
For Each CB In ActiveSheet.CheckBoxes
 If CB.Name <> ActiveSheet.CheckBoxes("Check Box 1").Name And _
 CB.Value <> ActiveSheet.CheckBoxes("Check Box 1").Value And _
 ActiveSheet.CheckBoxes("Check Box 1").Value <> 2 Then
 ActiveSheet.CheckBoxes("Check Box 1").Value = 2
Exit For
 Else
 ActiveSheet.CheckBoxes("Check Box 1").Value = CB.Value
 End If
Next CB
End Sub
This code makes sure that your 'Master Checkbox', changes its state if you individually change the state of any of the 'Child Checkboxes'.Note: If your 'Master Checkbox' has a name different that "Check Box 1", then make sure to use that exact name in the VBA code above.
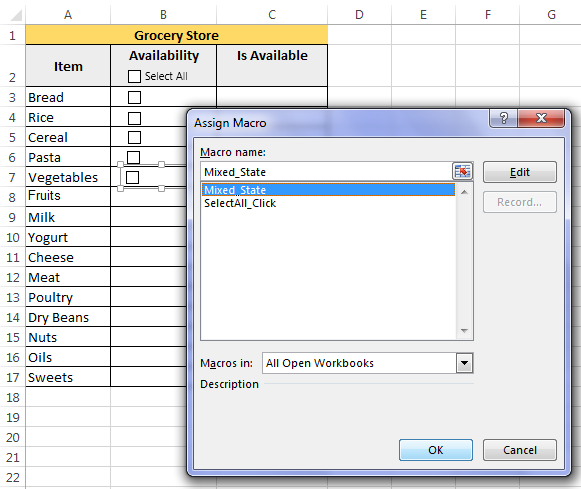
- Now, add the 'Child Checkboxes' one by one, and on the click event of each child checkbox assign the "Mixed_State" macro as shown above. You can also assign the “cell_link” property for each 'Child Checkbox', but this is not mandatory.
- After this simply test your checkboxes and you should be good to go.
Get the spreadsheet with this example here. Wasn't that straightforward? So straightforward that now you've successfully mastered the art of selecting multiple checkboxes using a single checkbox.
As you bask in the success of today's tutorial, rest assured that we have the next one in the pipeline, ready for you to dive into. So, once you've championed this, we'll have the next tutorial ready for you to get your hands dirty with. Meanwhile, stay curious!
Note: No checkboxes were harmed in the making of this tutorial!
 This code makes sure that when your 'Master Checkbox' is checked, all the 'Child checkboxes' on the active sheet should follow it i.e. they should have the same value as it has.Note: Make sure that the name of your 'Master Checkbox' is "Check Box 1". If not, then change the "Check Box 1" in the above VBA code with with the exact name of your 'Master Checkbox.'. You can check the name of your 'Master Checkbox' using the “