If the regular black borders are not doing it for you and your organization senses are screaming for order, color sorting will do what nothing else can. Many a time it may not be practical to change the font color. While color fill is another good sorting friend, this tutorial is all about changing border colors.
Why switch out of black borders? You could be conforming to a format (all receipts ink in blue), color-coding columns, or maybe your fancy rainbow streak is on. Today you will learn how to change border colors using your cursor like a digital color pencil, using some quick keys and Format Cells, and even changing the default border color. All that sits right below, so let’s start digging.

Method #1 – Change Border Color From Ribbon
The easiest approach on the Excel horizon is the ribbon with its all-encompassing menu. The little border icon will instantly tell you where to look. Let’s find out what lies there.
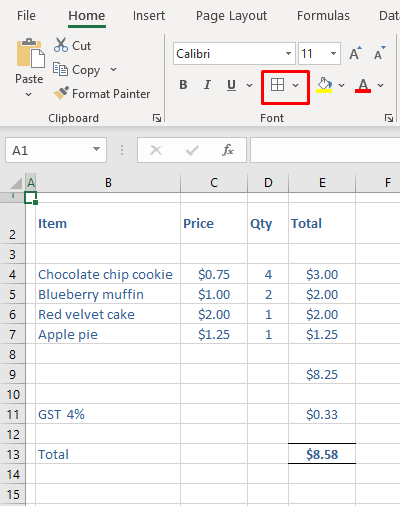
- The Font section in the Home tab has a small border icon with a little arrow for a drop-down menu; click it.
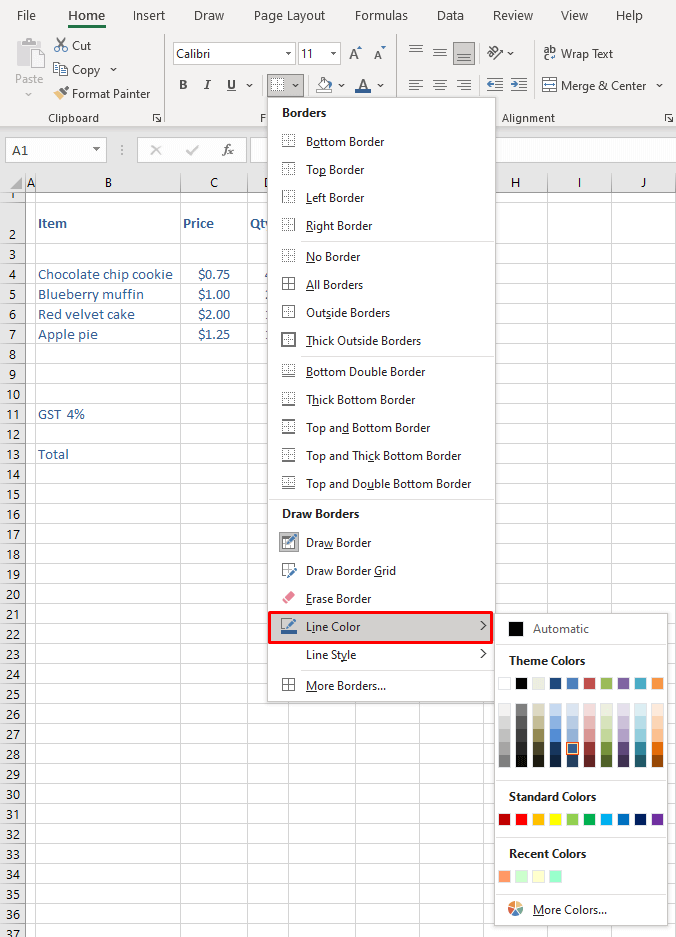
- From the drop-down menu, hover on to Line Color and click on your choice of border color.
- Once chosen, you will notice the cursor has changed to a pencil icon.
- Click on the borders to change their color.
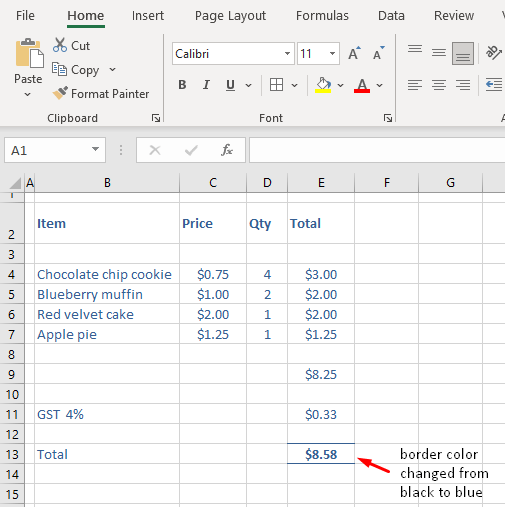
- Press the Esc key to return to the original cursor. The border pen can be used as a pen and not just as a color-changing tool.
- To add new borders, click on the gridlines where you want to add borders.
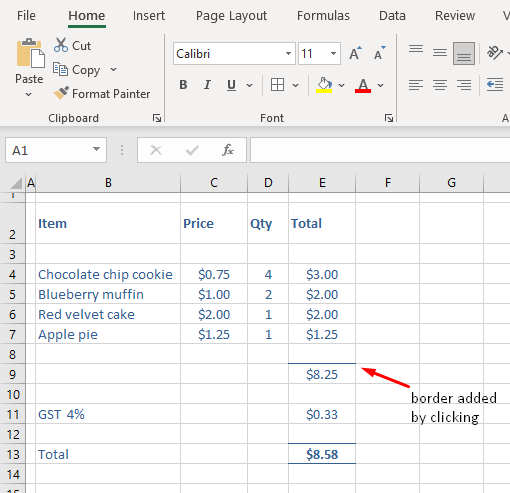
- Clicking and dragging will add a square border.
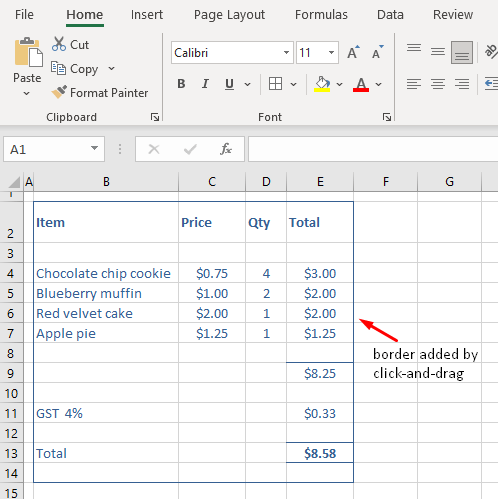
- Clicking and dragging across a cell can add a square border and with a bit of corner-to-corner angling, you can add a diagonal border across a cell.
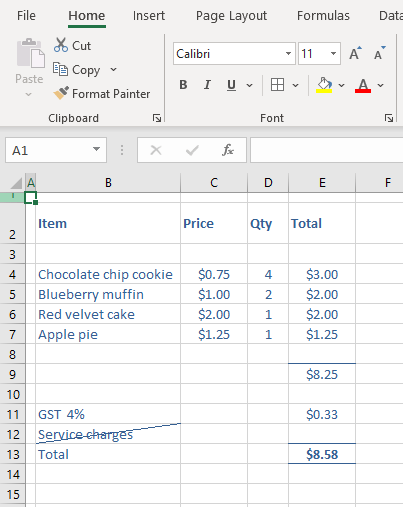
Handling borders from the ribbon is a very open option as you quickly get to switch between colors, border styles and add or erase borders in a matter of a few clicks, not to mention the ease of access.
This was the mouse-savvy way of changing border colors from the ribbon. The keyboard-savvy way is in the segment below.
Method #2 – Change Border Color Using Format Cells Dialog
Borders come under the band of cell formatting and so we can use the Format Cells options to change border colors. Here’s how to arrive at the border settings using the Format Cells dialog:
- Select the cells with the borders requiring color change.
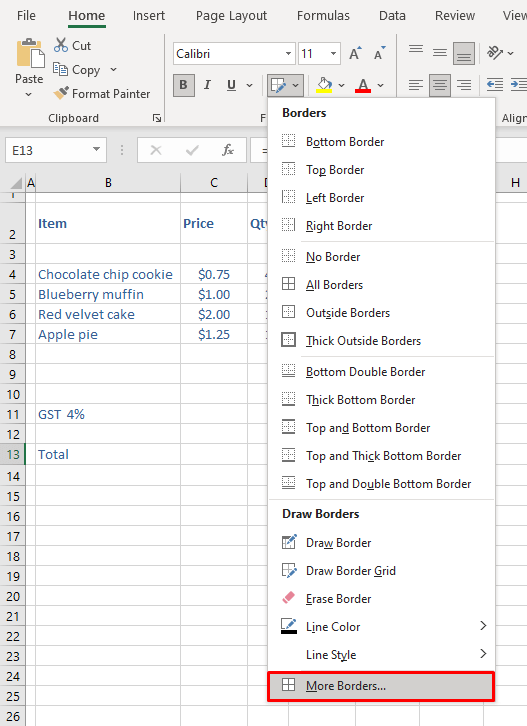
- Press Ctrl + 1 to launch the Format Cells dialog box or click the arrow with the border icon in the Home tab’s Font Select More Borders… from the menu.
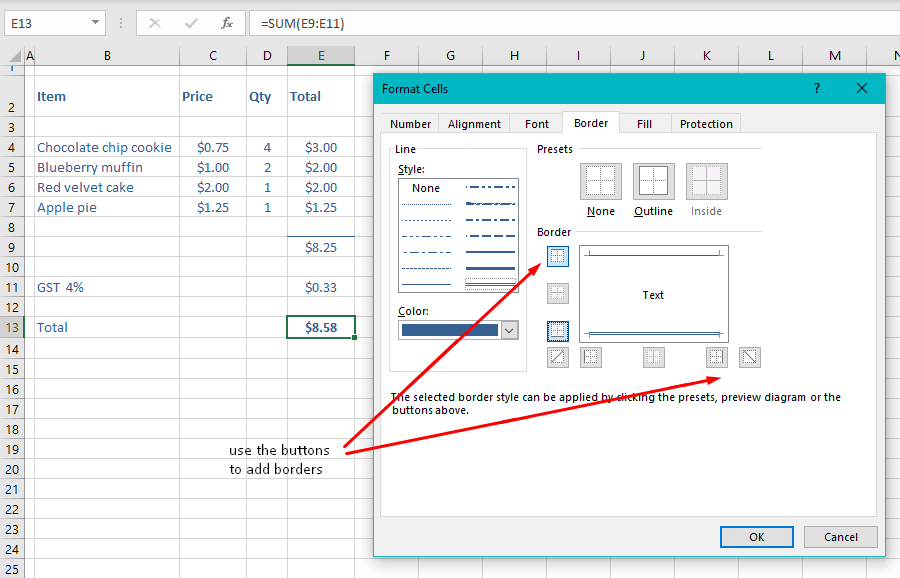
- In the Border tab, pick the color of choice from the Color menu and the style (if need be) from the Style section
- Use the Border buttons surrounding the sample field to enter the borders.
- For each change in color and/or style, you will need to choose from the respective menus and add them using the Border buttons.
- Click OK when done.
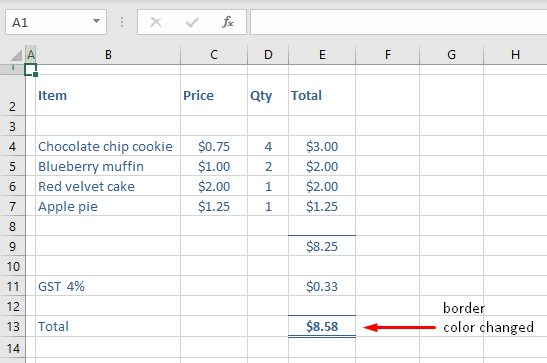
As you can see, ease of access for our case is a bit hindered by this option, having to make separate selections for separate border styles every time.
However, for dealing with a repetitive border or a large number of cells, Format Cells would fare well with all the options open in display in one window.
Method #3 – Change Border Color Using Keyboard Shortcut
The shortcut keys for changing the cell border color are:
Alt, H, B, I
Enter the keys one after the other, not together.
Alt displays the shortcut keys for the ribbon tabs.
H selects the Home tab.
B opens the border menu.
I selects Line Color from the menu.
This is how to apply this keyboard shortcut to change border color:
- Press the keys Alt, H, B, I one after the other.
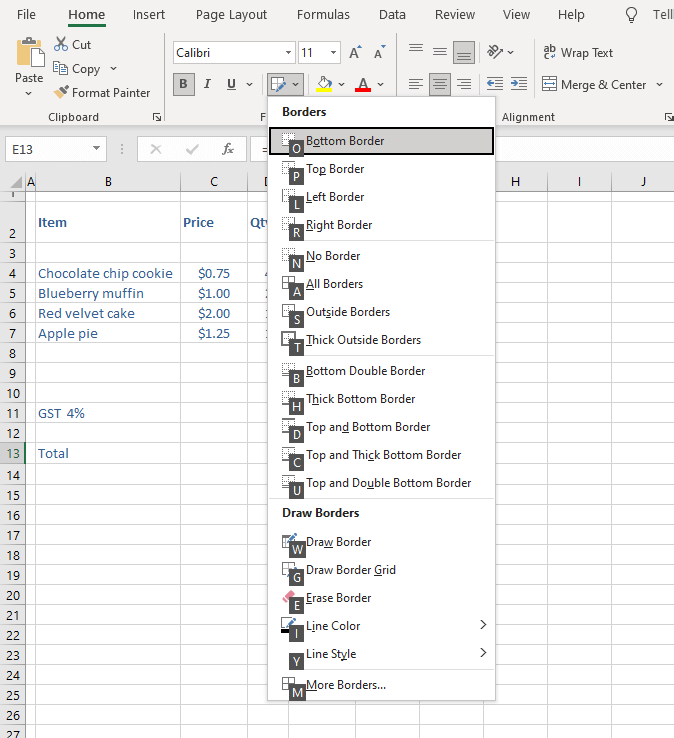
- Select the color of choice from the Line Color
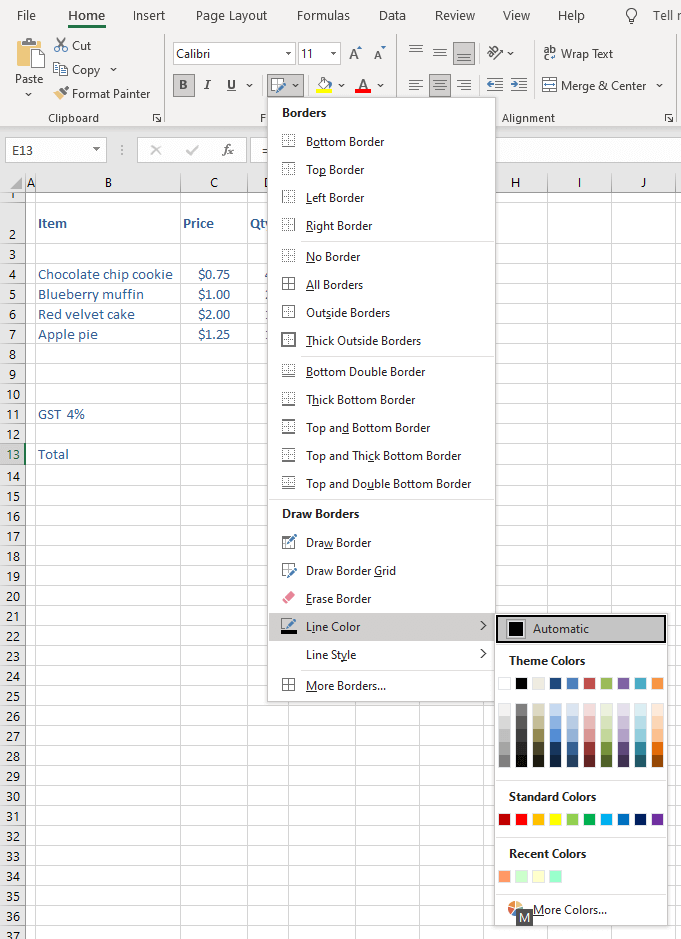
- Once the color is selected, the cursor will change to a pencil icon which will be your border pen until you press the Esc key.
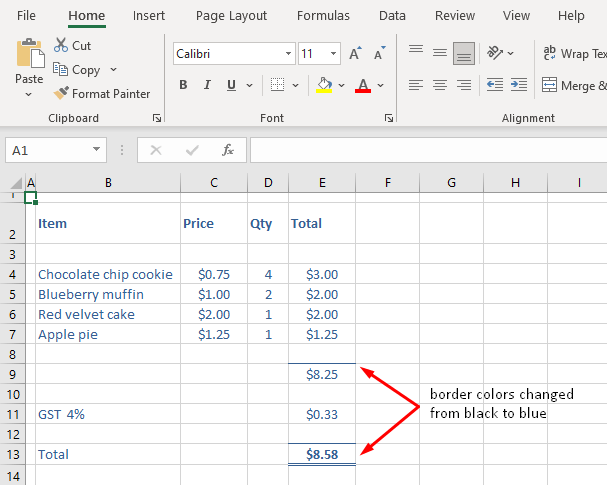
- Click on the borders to change their color.
- Select the style of the border from the border menu, if need be.
Recommended Reading: How to Rotate Text in Excel
Change the Default Border Color
Let’s say you’re not floating well with having to change the border color to the same color every time! With a bit of background tweaking, you can have your go-to border color set to default. One method is to hack the color of the gridlines forcing border colors to follow suit. The other is to set a Table Style. Let’s look into them.
Change the Gridlines Color
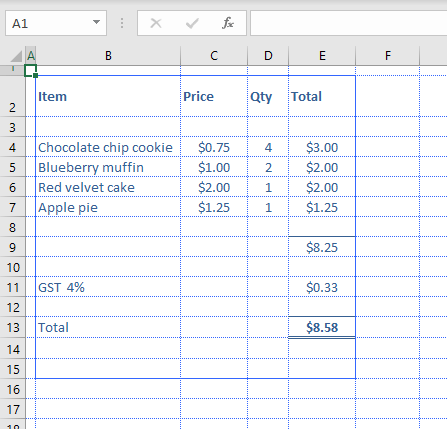
When you change the color of the gridlines, the default color of the borders (which is black) changes to the same color as the gridlines but a darker tone. Hence, the color you choose for the gridlines should be lighter than the default color you want to set for the borders. Find the steps for this below:
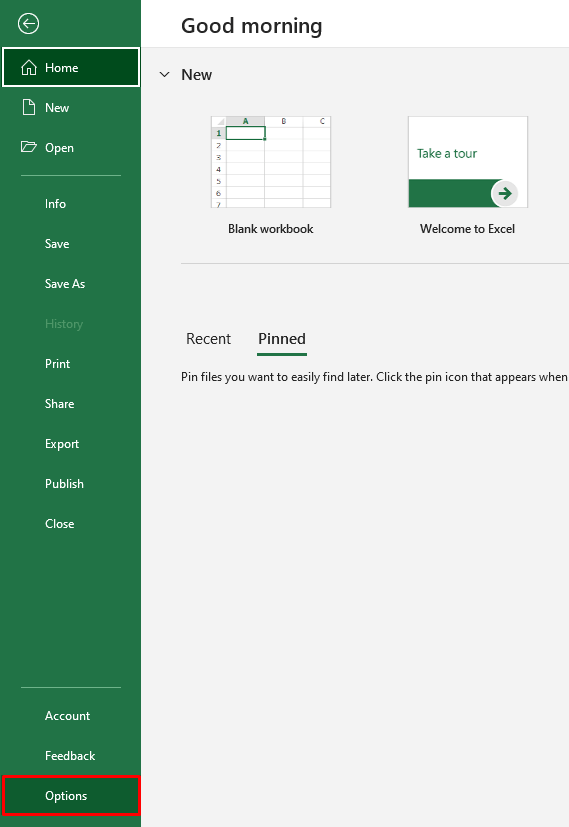
- Go to the File tab on the worksheet.
- Select Options from the left pane.
- Select Advanced from the left panel of the Excel Options
- Scroll down to the Display options for this worksheet: section and select the color for the gridlines (a shade lighter than the intended default border color).
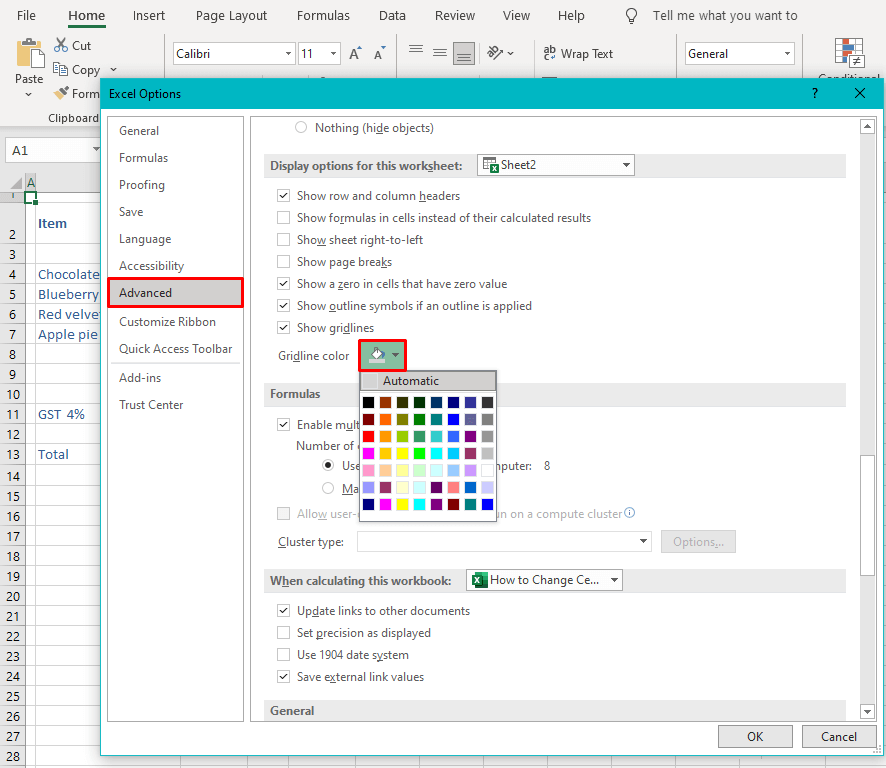
- Click OK.
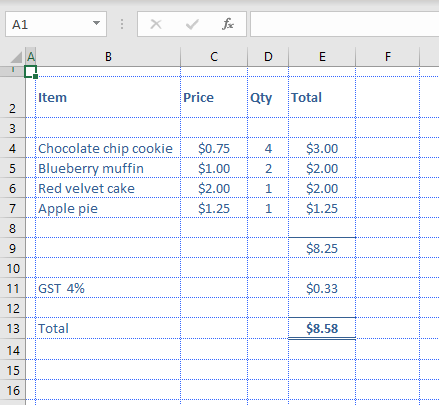
The color of the gridlines will be changed now:
When you add a border, by default it will be a darker shade than the color of the gridlines:
Set a Custom Table Style
Setting a custom table style can have your borders come out the same way every time you select them from Table Styles. Follow these steps to set up a custom table format:
- Select the dataset to be made into a table.
- From the Home tab, in the Styles group, click on the Format as Table
- Select New Table Style… from its menu.
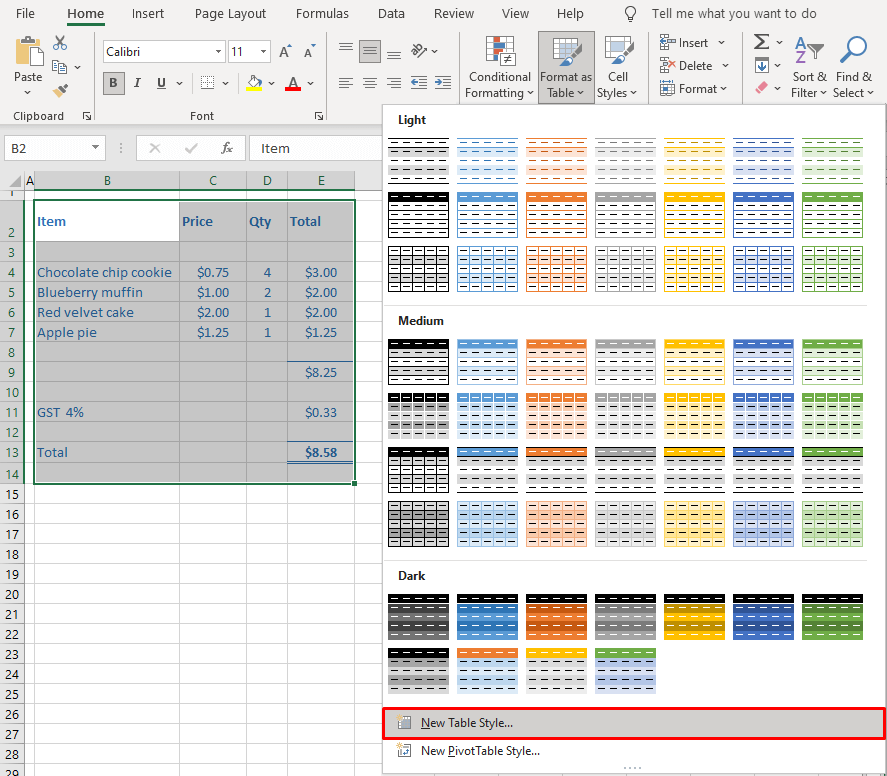
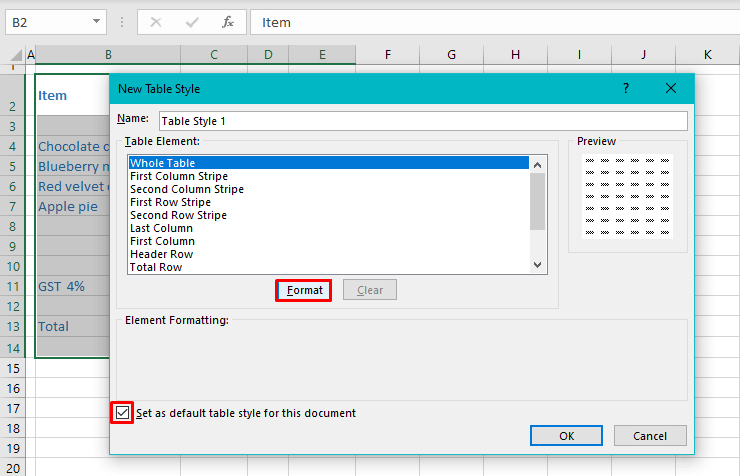
- In the New Table Style dialog box, select:
- Whole Table from the Table Element list
- the Set as default table style for this document checkbox
- the Format button to open the Format Cells dialog box.
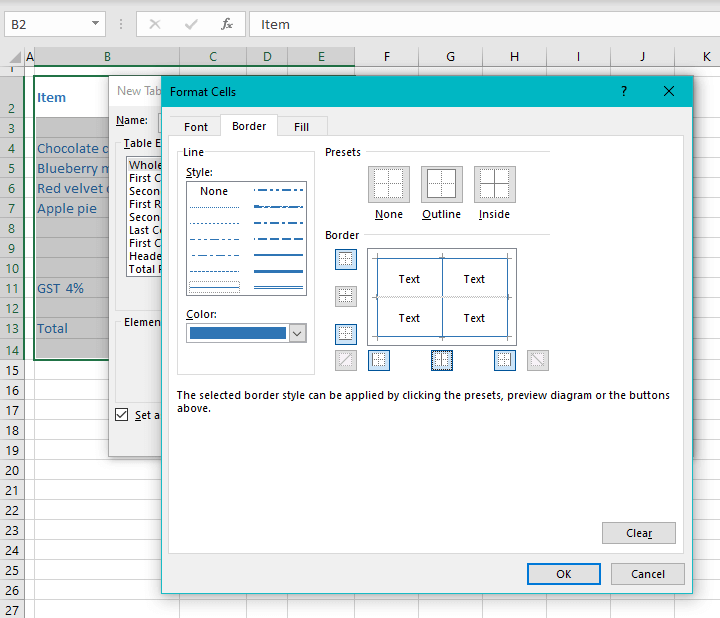
- Set the border colors and border styles of preference.
- Then click OK on both windows.
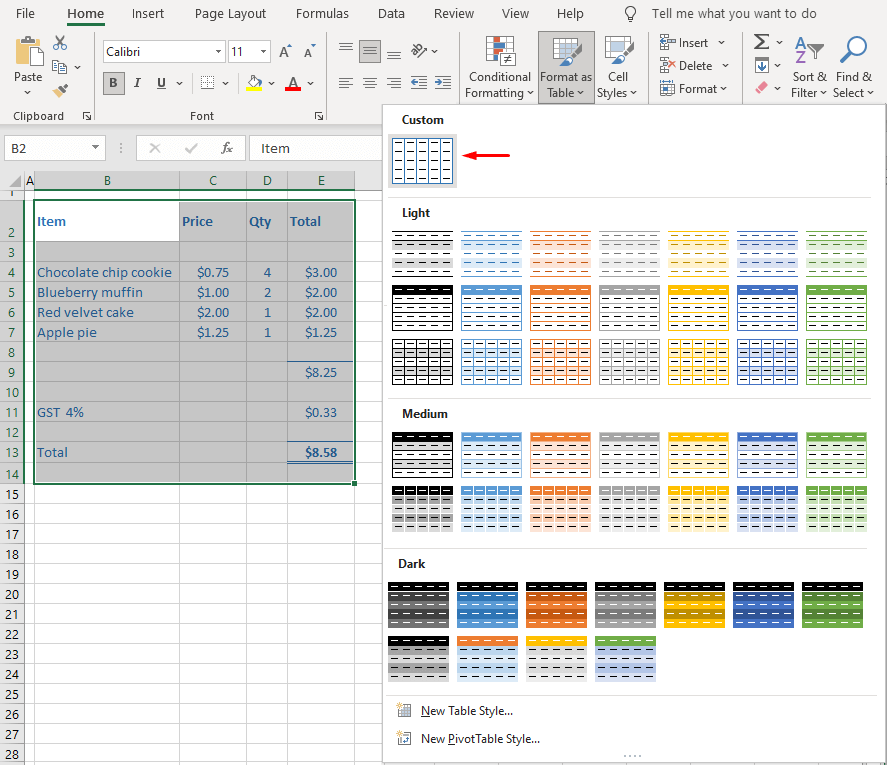
- Now select the custom style from the Home tab > Styles group > Format as Table
- A pop-up will appear to confirm the table selection.
- Check the My table has headers checkbox if the selected dataset has headers.
- Click OK.
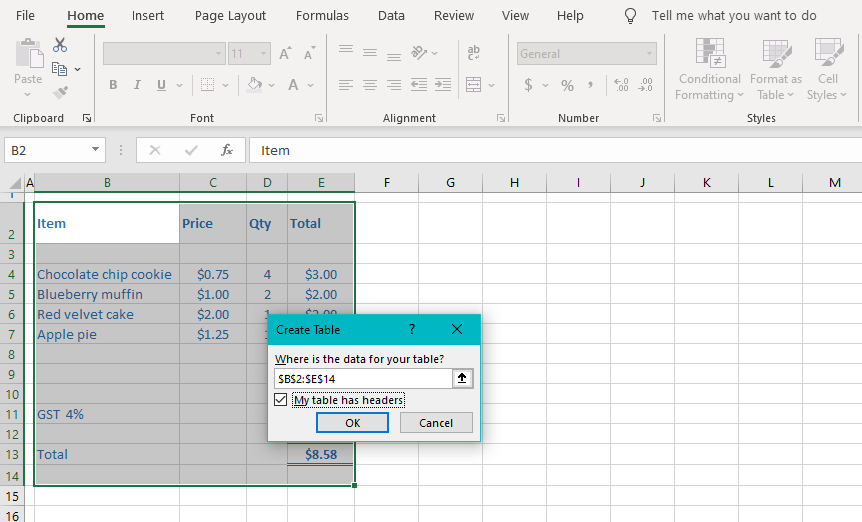
The borders will appear in the set color and style:
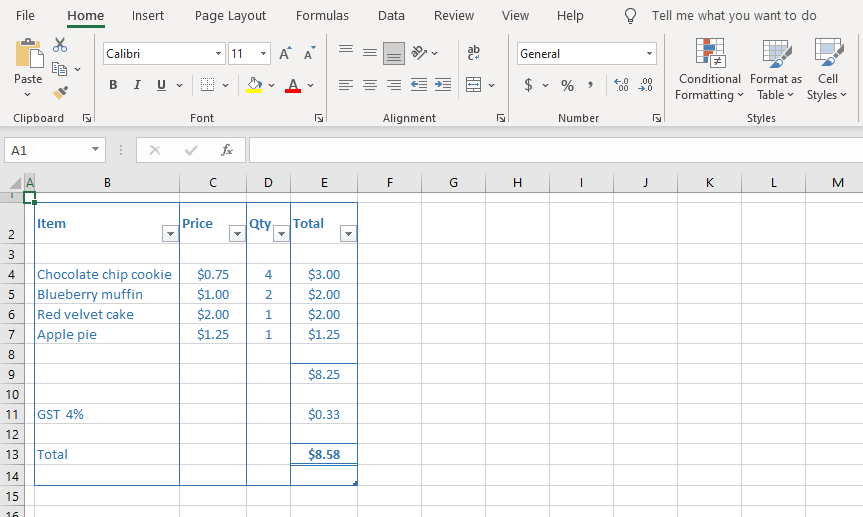
This method is quite handy for bordering tables and tabular data. You may even choose a preset style.
Let’s wind up things up now. This tutorial showed you a few options to change the cell border color in Excel. The Excel ribbon serves as a very free-hand option for quick borders in multiple colors and styles. The other options are helpful for repeating tasks and set ways. There’s a shoe for every fit! We’re working on more shoes and will be quick for the fitting, your Excel case very much like our Cinderella!


